Table of Contents
25 Best Accessories for the Toyota RAV4: Complete Guide to Upgrades and Add-Ons
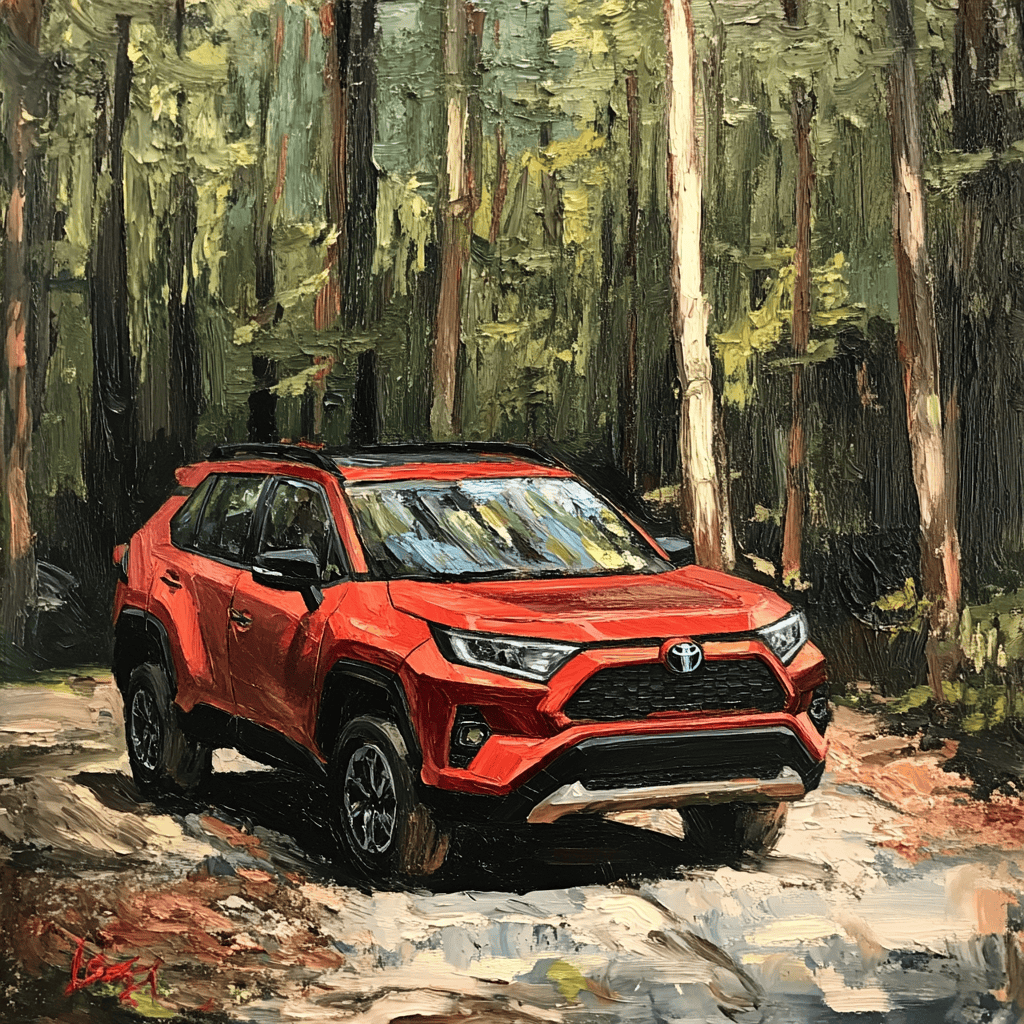
The Toyota RAV4 has earned its reputation as one of America’s best-selling SUVs through a winning combination of reliability, versatility, and thoughtful design. Whether you’ve just purchased your RAV4 or have been enjoying it for years, the right accessories can transform your driving experience—adding convenience, protection, style, and functionality that perfectly aligns with your lifestyle.
From essential protective items that preserve your investment to high-tech upgrades that enhance safety and comfort, the accessory market for the RAV4 is vast and sometimes overwhelming. This comprehensive guide cuts through the noise to identify the best RAV4 accessories available today, explaining what each accessory does, why it matters, and how to choose the right options for your specific needs.
Whether you’re an outdoor enthusiast hauling adventure gear, a family shuttling kids to activities, a daily commuter navigating city streets, or someone who simply wants to maximize their RAV4’s potential, you’ll find valuable accessory recommendations tailored to your situation.
Why Accessories Matter for Your Toyota RAV4
Before diving into specific products, it’s worth understanding why accessories deserve your attention and investment.
Protecting Your Investment
Your RAV4 represents a significant financial investment—likely $30,000-$45,000 or more depending on trim and options. Protective accessories like floor mats, cargo liners, and seat covers prevent wear, stains, and damage that would otherwise diminish your vehicle’s condition and resale value.
Consider that replacing stained carpeting costs hundreds of dollars, reupholstering seats can run into thousands, and extensive cargo area damage reduces resale value considerably. Spending $100-300 on protective accessories now prevents these far more expensive problems later.
Enhancing Functionality
The RAV4’s design prioritizes broad appeal, meaning it comes from the factory in a configuration that works well for many buyers but may not perfectly suit your specific needs. Functional accessories like roof racks, cargo organizers, and towing accessories customize your RAV4 for your particular lifestyle and activities.
An outdoor enthusiast needs different functionality than a urban commuter, and accessories bridge the gap between the vehicle’s stock configuration and your ideal setup.
Improving Safety and Security
Safety-focused accessories like dash cams, blind spot mirrors, and upgraded lighting don’t just provide peace of mind—they can prevent accidents, protect you from fraudulent claims, and improve visibility in challenging conditions. These accessories often pay for themselves the first time they help you avoid an accident or prove fault in an incident.
Adding Convenience and Comfort
Convenience accessories like wireless charging pads, phone mounts, and organizational solutions make daily driving more enjoyable and less frustrating. These quality-of-life improvements might seem minor individually, but collectively they significantly enhance your ownership experience.
Expressing Personal Style
Your RAV4 should reflect your personality and preferences. Styling accessories let you customize appearance, making your vehicle distinctly yours rather than looking identical to thousands of others on the road.
Maintaining Resale Value
Many accessories actually increase resale value when it’s time to sell or trade. Well-maintained vehicles with desirable accessories (roof racks, premium floor mats, cargo management solutions) command higher prices and sell faster than bare-bones equivalents with wear and damage.
Now let’s explore the best accessories across multiple categories, from essential must-haves to nice-to-have upgrades.
Essential Protection Accessories
These accessories form the foundation of RAV4 ownership, protecting your vehicle from everyday wear and environmental challenges.
1. All-Weather Floor Mats
Why you need them: Factory carpet floor mats look nice initially but absorb water, mud, snow, and spills—leading to staining, odors, and deterioration. All-weather floor mats provide superior protection while remaining easy to clean.
Key features to look for:
- Custom fit – Generic mats shift around and don’t provide complete coverage. RAV4-specific mats fit perfectly, with proper holes for retention hooks.
- High walls/edges – Deep channels contain spills and slush, preventing liquids from reaching carpet.
- Durable materials – Quality rubber or thermoplastic compounds withstand temperature extremes without cracking.
- Easy cleaning – Simple rinse with a hose restores like-new appearance.
- Non-slip backing – Prevents mats from sliding underfoot, which creates safety hazards.
Top brands:
WeatherTech FloorLiner – Premium option with laser-measured fit, high edges, and comprehensive coverage including footwell walls. Available in black, tan, and gray. Cost: $150-250 for complete set.
Husky Liners WeatherBeater – Excellent mid-range option offering similar protection at lower cost. Deep grooves channel water effectively. Cost: $100-180 for complete set.
3D MAXpider Kagu – Unique textured design that’s stylish and effective. Lighter weight than traditional rubber mats while still durable. Cost: $120-200 for complete set.
Installation: Simply remove factory mats, hook new mats to factory retention points, and you’re done in minutes.
Maintenance: Remove periodically, shake out debris, spray with hose, and reinstall. In winter, remove ice buildup before bringing into warm garage to prevent melting water from pooling.
Pro tip: Order a complete set (front, rear, cargo area) for comprehensive protection. Individual pieces can be purchased separately but buying sets saves money.
2. Cargo Liner/Trunk Mat
Why you need it: The RAV4’s cargo area takes serious abuse from groceries, sports equipment, pets, camping gear, and countless other items. Factory carpeting stains easily and is difficult to clean once damaged.
Key features:
- Raised edges – Keep spills contained within cargo area
- Non-slip surface – Prevents items from sliding during driving
- Custom fit – Covers entire cargo floor including spare tire area
- Durable construction – Withstands heavy loads without tearing
Top options:
WeatherTech CargoLiner – Precision-fit with high edges and comprehensive coverage. Digital laser scanning ensures perfect fit. Cost: $120-180.
Husky Liners Cargo Liner – Excellent protection at more affordable price point. Textured surface grips cargo well. Cost: $80-120.
Motor Trend FlexTough – Budget-friendly option with good protection. Trim-to-fit design works for multiple model years. Cost: $40-70.
Usage scenarios:
- Transporting groceries (especially leaky bags)
- Hauling sports equipment (muddy cleats, wet swimsuits)
- Pet transport (dog hair, muddy paws, accidents)
- Moving/hauling (tools, plants, hardware)
- Camping gear (wet tents, dirty equipment)
Additional considerations: Some cargo liners offer raised sides that create a basin effect, containing liquids completely. Others fold down rear seats while maintaining protection. Choose based on your most common usage patterns.
3. Seat Covers
Why consider them: While not essential for all owners, seat covers protect against:
- Wear from repeated entry/exit
- Staining from spills and food
- Pet hair and scratches
- UV damage and fading
- Sweat and body oils
Types of seat covers:
Universal vs. custom-fit – Universal covers fit many vehicles but often don’t look factory-installed. Custom-fit covers designed specifically for RAV4 seats provide better appearance and fit.
Material options:
Neoprene covers – Waterproof, durable, comfortable. Excellent for water sports enthusiasts, pet owners, or families with small children. Cost: $150-300 per pair.
Leatherette/faux leather – Upscale appearance, easy to clean, good durability. Makes cloth seats look and feel more luxurious. Cost: $100-250 per pair.
Canvas/Carhartt-style – Extremely durable and rugged. Perfect for work vehicles or outdoor adventure use. Cost: $150-300 per pair.
Genuine leather – Premium option providing luxury appearance and feel. Expensive but transforms interior. Cost: $300-600+ per pair.
Cooling mesh – Breathable material for hot climates, prevents sweating and improves comfort. Cost: $50-150 per pair.
Top brands:
- Covercraft – Industry leader offering multiple material options
- FH Group – Affordable options with decent quality
- Wet Okole – Premium neoprene covers, virtually waterproof
- Clazzio – High-quality leather-like covers with excellent fit
Installation: Varies by cover type. Some slip on easily in 15-20 minutes, while others require more careful installation with hooks, straps, and Velcro for perfect fit.
Consider your needs:
- Pet owners – Waterproof neoprene or heavy-duty canvas
- Families with children – Easy-to-clean materials like leatherette
- Style-conscious drivers – Leather or high-quality leatherette
- Outdoor enthusiasts – Durable canvas or neoprene
- Hot climate residents – Cooling mesh or light-colored materials
4. Mud Flaps
Why you need them: RAV4s, especially those used off-road or in winter climates, benefit enormously from mud flaps (also called splash guards). They:
- Protect paint from rock chips thrown up by tires
- Reduce mud and water spray on vehicle sides
- Minimize debris spray onto following vehicles
- Preserve resale value by preventing lower panel damage
Options:
OEM Toyota Mud Guards – Designed specifically for RAV4, perfect fit and finish. Match vehicle paint or come in black. Professional appearance. Cost: $60-120 for set of four.
Husky Liners Mud Guards – Thicker, more aggressive protection than OEM. Available in black. Wider coverage area. Cost: $50-90 for set.
WeatherTech DigitalFit Mud Flaps – Custom-molded for perfect RAV4 fit. No drilling required for installation on most model years. Cost: $60-100 for set.
Rally Armor Mud Flaps – For owners wanting sportier appearance. Available in multiple colors with logo. More flexible material. Cost: $70-130 for set.
Installation: Most mud flaps install in 30-60 minutes with basic hand tools. Some mount to existing holes, others require drilling small holes (usually pre-marked for accuracy).
Pro tip: Install mud flaps on new vehicles immediately to prevent paint damage from day one. On older vehicles, they prevent additional damage even if some has already occurred.
5. Paint Protection Film (PPF) and Vinyl Wrap
Why consider it: The RAV4’s front end, mirrors, door edges, and rear bumper are particularly vulnerable to chips, scratches, and damage. Paint protection film provides invisible armor.
Common protected areas:
- Full front bumper
- Hood (partial or full)
- Fender areas behind front wheels
- Mirror backs
- Door edges and handles
- Rear bumper loading area
Options:
Professional full front-end PPF – Covers hood, bumper, fenders, mirrors. Virtually invisible when properly installed. Self-healing properties repair minor scratches with heat. Cost: $1,500-3,000.
DIY partial PPF kits – Pre-cut pieces for high-impact areas (door edges, rear bumper ledge, mirror backs). Cost: $50-200.
Vinyl wrap – Alternative to PPF that can change vehicle color while protecting paint. More visible than clear PPF. Cost: $500-5,000 depending on coverage.
Brands to consider:
- XPEL Ultimate Plus (self-healing, top-tier)
- 3M Scotchgard Pro
- SunTek Ultra
- Various budget-friendly DIY options
Professional installation recommended for extensive coverage. DIY works for simple areas like door edges or rear bumper lips.
Interior Organization and Convenience
Transform your RAV4’s interior into a perfectly organized space optimized for your lifestyle.
6. Cargo Organizer
Why you need it: Without organization, the cargo area becomes chaos—items rolling around, tipping over, and creating frustration every time you brake or turn.
Types:
Collapsible organizers – Fold flat when not needed, expand to create compartments. Perfect for groceries, preventing items from rolling. Cost: $25-60.
Rigid organizers – Permanent structure with multiple compartments. Excellent for tools, emergency supplies, or regular cargo. Cost: $40-100.
Nets and dividers – Attach to cargo area hooks to create barriers and storage pockets. Cost: $15-40.
Drawer systems – Professional-grade storage with pull-out drawers. Excellent for contractors or serious overland enthusiasts. Cost: $300-800.
Features to prioritize:
- Multiple compartments of varying sizes
- Secure attachment system (prevents sliding)
- Easy collapse/storage when not needed
- Durable construction
- Easy cleaning
Top picks:
Drive Auto Products Cargo Organizer – Collapsible with adjustable compartments. Strong straps keep it secure. Cost: $35-50.
FORTEM Car Trunk Organizer – Heavy-duty with reinforced walls. Multiple pockets for small items. Cost: $30-45.
Decked Drawer System – Premium solution with weather-resistant drawers and bed surface on top. Expensive but transforms cargo capability. Cost: $1,200-1,600.
7. Center Console Organizer
Why you need it: The RAV4’s center console, while spacious, becomes a jumbled mess of charging cables, sunglasses, receipts, pens, and miscellaneous items without organization.
Options:
Insert trays – Fit into console creating compartments for different items. Some include coin holders, phone slots, and cable management. Cost: $15-35.
Armrest organizer box – Adds a secondary storage box on top of or beside the armrest. Cost: $20-40.
Features:
- Perfect fit for RAV4 console dimensions
- Soft-touch materials (prevent rattling and scratching)
- Multiple compartment sizes
- Easy removal for cleaning
8. Door Pocket Organizers
Why useful: Door pockets collect random items and are difficult to organize effectively. Purpose-built organizers create structure.
Options include:
- Hanging pocket organizers that attach to door panel
- Insert trays that fit into existing door pockets
- Bottle holders that stabilize drinks
Cost: $10-25 per set
9. Seatback Organizers
Why families need them: Keep rear passengers’ items accessible and organized while preventing clutter from spreading throughout the vehicle.
Features:
- Multiple pockets for tablets, books, toys, bottles
- Tablet holder for rear-seat entertainment
- Easy-clean materials (important for families)
- Universal attachment to front seat backs
Uses:
- Kids’ entertainment items
- Snacks and drinks
- Travel games
- Charging cables
- Maps and travel documents
Cost: $15-40 each
10. Wireless Charging Pad
Why you want it: Many RAV4 trims don’t include wireless charging despite it being standard on many modern vehicles. Adding wireless charging eliminates cable clutter and ensures devices stay charged.
Options:
OEM-style integrated chargers – Mount in center console area, look factory-installed. Require more complex installation. Cost: $60-120.
Portable charging pads – Sit in cup holder or console. Easy installation, less integrated appearance. Cost: $25-50.
Considerations:
- Phone compatibility (Qi-enabled devices)
- Charging speed (5W, 7.5W, 10W, 15W)
- Heat management (some chargers overheat phones)
- Secure mounting
Top picks:
- Anker PowerWave (reliable, well-reviewed)
- Mophie Wireless Charging Pad
- Samsung Wireless Charger
- RAV4-specific integrated options from aftermarket manufacturers
11. Phone Mount
Why essential: Using your phone for navigation, music control, or hands-free calls requires secure mounting. Fumbling with your phone while driving is dangerous and often illegal.
Types:
Dashboard mount – Attaches to dashboard with adhesive or suction. Provides clear visibility. Cost: $15-35.
Vent mount – Clips to air vent. Easy installation, less obtrusive, but blocks air flow. Cost: $10-25.
CD slot mount – Inserts into unused CD player slot (if equipped). Very stable. Cost: $15-30.
Windshield mount – Suction cup attachment to windshield. Some states restrict this due to visibility concerns. Cost: $15-30.
MagSafe mount – For iPhone 12 and newer with MagSafe. Magnetic attachment is elegant and secure. Cost: $30-60.
Features to prioritize:
- Strong grip (prevents phone from falling)
- Adjustable viewing angle
- Easy one-handed phone placement/removal
- Compatibility with your phone (size and case)
- Doesn’t block controls or visibility
Top brands:
- iOttie (widely regarded as best)
- RAM Mounts (extremely durable)
- Spigen
- Scosche MagicMount
Pro tip: Consider dash cam placement when choosing phone mount location to avoid obstructing camera view.
Technology and Entertainment Upgrades
Enhance your RAV4 with modern technology that improves safety, entertainment, and connectivity.
12. Dash Cam (Front and Rear)
Why you need it: Dash cams provide irrefutable evidence in accidents, protect against fraudulent claims, capture unexpected events, and may even reduce insurance premiums.
Key features:
Resolution – Minimum 1080p, ideally 4K for license plate clarity Field of view – 140-170 degrees captures multiple lanes Night vision – Critical for low-light recording GPS – Records location and speed data Parking mode – Records when vehicle is parked (requires hardwire installation) Loop recording – Automatically overwrites oldest footage G-sensor – Detects impacts and locks current footage Dual cameras – Front and rear coverage for complete protection
Top options:
Rove R2-4K Dash Cam – Excellent image quality, built-in GPS, wide viewing angle, easy to use. Cost: $150-200.
Garmin Dash Cam 67W – Compact, voice control, excellent app connectivity, driver alerts. Cost: $250-300.
BlackVue DR900X-2CH – Premium dual-camera system with cloud connectivity, parking mode, and exceptional image quality. Cost: $450-550.
VIOFO A129 Plus Duo – Best value dual-camera option with good quality and features. Cost: $150-200.
Nextbase 622GW – Premium features including emergency SOS, Alexa integration, and what3words location. Cost: $350-400.
Installation options:
Basic – Power from cigarette lighter, mount to windshield with adhesive. Simple but cable visibility isn’t ideal.
Hardwire – Connect directly to vehicle electrical system. Cleaner installation, enables parking mode. Requires professional installation or advanced DIY skills.
Pro tip: Position camera behind rearview mirror to minimize visibility obstruction. Ensure it doesn’t interfere with advanced safety features that use windshield-mounted sensors.
Insurance benefits: Some insurers offer discounts for dash cam installation. Check with your provider.
13. Rear Seat Entertainment System
Why families want it: Long drives with kids become significantly more pleasant when rear passengers can watch movies, play games, or stay entertained.
Options:
Tablet mounts – Attach tablets you already own to front seat headrests. Most affordable option. Cost: $15-30 per mount.
Portable DVD players – Standalone screens with DVD player built in. No internet required. Cost: $80-150 each.
Headrest monitors – Replace factory headrests with versions containing screens. Can connect to various video sources. Cost: $150-300 per headrest.
Overhead flip-down monitor – Single large screen mounted to ceiling. Visible to all rear passengers. Cost: $200-400.
Features to consider:
- Screen size (9-12 inches typical)
- Resolution (at least 720p)
- Connectivity (HDMI, USB, wireless)
- Dual screen capability (independent content)
- Headphone jacks (prevent driver distraction)
- Durability (kids aren’t always gentle)
Content options:
- Streaming via mobile hotspot
- Downloaded content on tablets
- DVDs (no internet required)
- Gaming consoles
Pro tip: Provide headphones for rear passengers to prevent audio distraction for the driver.
14. Blind Spot Mirrors
Why valuable: While newer RAV4s include blind spot monitoring systems, older models don’t, and even with technology, additional visibility helps.
Types:
Stick-on convex mirrors – Attach to existing side mirrors, expand field of view. Cost: $10-20 per pair.
Replace entire mirror – Aftermarket heated, power-folding mirrors with larger glass area. Cost: $200-400 per pair plus installation.
Adjustable blind spot mirrors – More substantial than stick-on, better quality, adjustable angle. Cost: $20-35 per pair.
Installation: Stick-on mirrors attach with adhesive. Clean existing mirror thoroughly, position new mirror in lower outer corner, press firmly.
Adjustment: Position to see down the vehicle’s side into the blind spot without duplicating existing mirror coverage.
Note: Some drivers find additional mirrors distracting. Test with inexpensive stick-on options before investing in expensive replacements.
15. Upgraded Audio System
Why consider it: The RAV4’s base audio system is adequate but not impressive. Upgraded speakers, amplifiers, or subwoofers transform the audio experience.
Upgrade paths:
Speaker replacement – Replace factory speakers with higher-quality aftermarket options. Modest investment with noticeable improvement. Cost: $200-500 for premium speaker set.
Amplifier addition – Add aftermarket amplifier to power speakers more effectively. Significant improvement. Cost: $300-600 plus installation.
Subwoofer addition – Add bass that factory system lacks. Powered subwoofers fit under seats or in cargo area. Cost: $150-500.
Complete system replacement – New head unit, amplifiers, speakers, subwoofer for audiophile-quality sound. Cost: $1,500-4,000+.
Top brands:
- JBL (RAV4 premium option)
- Pioneer
- Kenwood
- Alpine
- JL Audio (subwoofers)
- Kicker
Installation: Speaker replacement is DIY-friendly for experienced hobbyists. Amplifier and subwoofer installation often requires professional work for best results and to avoid electrical issues.
Consideration: Extensive audio modifications can affect resale value negatively if not done professionally or if too specialized.
Exterior Accessories and Styling
Customize your RAV4’s appearance while adding functional benefits.
16. Roof Rack and Cross Bars
Why you need them: The RAV4’s cargo area is spacious but sometimes insufficient for bulky items. Roof racks expand carrying capacity dramatically.
Types:
Factory Toyota cross bars – Perfect fit, designed specifically for RAV4 roof rails. Professional appearance. Cost: $200-300.
Thule AeroBlade/WingBar – Premium aftermarket option with aerodynamic design reducing wind noise. Cost: $300-450.
Yakima JetStream/CoreBars – Another premium option, excellent quality and features. Cost: $300-450.
BRIGHTLINES Roof Racks – Budget-friendly option with decent quality. Cost: $100-200.
Weight capacity: Most RAV4 roof racks support 150-176 lbs dynamic load (while driving), significantly more when stationary.
Uses:
- Bike racks (carry 2-4 bikes)
- Kayak/canoe carriers
- Ski/snowboard racks
- Cargo boxes (additional weatherproof storage)
- Rooftop tents (for overlanding)
- Lumber and long items
Installation: Most cross bars install in 15-30 minutes without tools, attaching to factory roof rails. Ensure proper torque and regular tightness checks.
Fuel economy impact: Empty roof racks reduce fuel economy by 1-5% depending on design. Aerodynamic options minimize this impact. Remove when not in use for optimal efficiency.
Noise: Wind noise is common with roof racks. Aerodynamic designs, proper installation, and wind fairings minimize noise.
17. Cargo Box
Why useful: Roof-mounted cargo boxes provide weather-resistant storage for camping gear, luggage, sports equipment, or seasonal items.
Sizes:
- Small (11-13 cubic feet) – Fits skis, snowboards, small loads
- Medium (14-16 cubic feet) – Good all-purpose size
- Large (18-22 cubic feet) – Maximum capacity for extended trips
Top brands:
Thule Force XT – Premium quality, dual-side opening, excellent weather resistance. Cost: $400-700 depending on size.
Yakima SkyBox – Great quality, slightly more affordable than Thule. Cost: $350-600.
SportRack Horizon – Budget option with decent quality. Cost: $250-400.
Features to prioritize:
- Dual-side opening (access from both sides)
- Secure locking
- Aerodynamic shape
- Easy mounting system
- Interior lighting
Installation: Cargo boxes mount to cross bars using included hardware. Ensure cross bars are properly rated for box weight plus contents.
Pro tip: Remove cargo box when not in use to reduce wind noise and improve fuel economy.
18. Hitch and Towing Accessories
Why valuable: The RAV4 can tow 1,500-3,500 lbs depending on configuration. A trailer hitch opens numerous possibilities.
Hitch classes:
Class I – 2,000 lb capacity, uses 1.25″ receiver. Adequate for small trailers. Cost: $150-250.
Class II – 3,500 lb capacity, uses 1.25″ receiver. Matches RAV4 towing capacity. Cost: $180-300.
Class III – 5,000+ lb capacity, uses 2″ receiver. Overkill for RAV4 but provides options. Cost: $200-350.
Installation: Professional installation recommended ($150-300 labor) to ensure proper attachment to frame and electrical connection.
Uses beyond towing:
- Bike racks (hitch-mounted carry 2-5 bikes)
- Cargo carriers (basket-style or enclosed)
- Mobility scooter/wheelchair carriers
- Towing small utility trailers
- Towing lightweight travel trailers or tear-drop campers
Electrical connection: 4-pin for lights, 7-pin includes trailer brakes (not typically needed for RAV4 applications).
Popular hitch brands:
- Curt Manufacturing
- Draw-Tite
- Reese
- Hidden Hitch
Towing accessories:
Trailer brake controller – Required for trailers over 2,000 lbs with electric brakes. Cost: $100-300.
Weight distribution hitch – Improves stability when towing heavier loads. Cost: $300-600.
Trailer mirrors – Clip-on extensions improve visibility past trailer. Cost: $30-80.
19. Running Boards / Side Steps
Why consider them: Running boards improve entry/exit ease, especially for children, elderly passengers, or those with mobility challenges. They also protect rocker panels from damage.
Types:
Traditional running boards – Wide, flat steps extending length of doors. Cost: $300-600.
Nerf bars – Tubular design with step pads at door locations. Sportier appearance. Cost: $250-500.
Power running boards – Automatically deploy when door opens, retract when closed. Premium option. Cost: $1,200-2,000.
Rock sliders – Designed for off-road protection more than entry ease. Very durable. Cost: $400-800.
Materials:
- Aluminum (lightweight, won’t rust)
- Steel (heavier, more durable, can rust)
- Stainless steel (rust-resistant, premium appearance)
Finish options:
- Chrome (classic appearance)
- Black powder-coat (modern, subdued)
- Polished aluminum (sporty)
- Textured (better grip, hides scratches)
Installation: Professional installation recommended due to weight and need for proper mounting. DIY possible for experienced mechanics.
Considerations:
- Ground clearance reduction (typically 2-3 inches)
- Impact on off-road capability
- Maintenance (cleaning, checking fasteners)
- Weight (reduces payload capacity slightly)
Top brands:
- N-FAB
- AMP Research (power steps)
- Westin
- Ionic
20. LED Light Upgrades
Why upgrade: LED bulbs provide brighter, whiter light that improves visibility while consuming less power and lasting longer than halogen bulbs.
Replacement opportunities:
Headlights – Brightest improvement, most noticeable upgrade. Ensure LED bulbs are legal in your jurisdiction (some states restrict aftermarket HID/LED headlights).
Fog lights – Improved visibility in adverse weather. Yellow LED fog lights reduce glare in fog and snow.
Interior lights – Brighter, whiter light makes interior more pleasant. Inexpensive upgrade.
Reverse lights – Brighter backup lighting improves safety when reversing at night.
License plate lights – Often forgotten but brighter whites improve appearance.
Top LED bulb brands:
- AUXITO (good value)
- SEALIGHT (reliable)
- Hikari
- JDM ASTAR
Cost: $20-100 per pair depending on type and quality.
Installation: Most LED bulbs install as direct replacements for factory bulbs in 5-15 minutes. Some require minor modifications or additional components.
Considerations:
- Ensure LED bulbs fit housing properly
- Check for warning lights (some vehicles report “bulb out” with LEDs)
- Verify beam pattern (poor LED bulbs create glare)
- Understand legal restrictions in your area
Color temperature: 5,000-6,000K provides bright white light. Lower (4,300K) is slightly yellow, higher (8,000K+) has blue tint.
21. Window Deflectors (Wind/Rain Guards)
Why useful: Window deflectors allow fresh air circulation even during rain and reduce wind noise when windows are partially open.
Benefits:
- Crack windows during rain without getting wet
- Reduce interior heat buildup when parked
- Minimize wind noise with windows slightly down
- Add subtle styling element
Types:
In-channel – Insert into window channel. Cleaner appearance, less visible. Cost: $60-100 for set.
Stick-on – Adhere to door exterior above window. Easier installation. Cost: $50-80 for set.
Brands:
- WeatherTech (premium quality)
- AVS Ventvisor
- EGR
- Putco
Installation: In-channel requires removing door panels. Stick-on requires thorough cleaning and careful adhesive application. Both are DIY-friendly.
22. Sunshade
Why essential: Sunshades reduce interior temperature significantly when parked, protect dashboard from UV damage, and prevent sun glare while driving.
Types:
Windshield sunshade – Reflects heat away from cabin. Foldable or roll-up designs. Custom-fit options provide better coverage. Cost: $15-35.
Side window shades – Protect passengers from direct sun, reduce heat. Important for rear passengers, especially children. Cost: $10-25 per pair.
Rear window shade – Reduces glare and heat from behind. Cost: $15-30.
Custom-fit vs. universal – Custom-fit shades designed for RAV4 windows fit perfectly and provide maximum coverage. Universal shades are cheaper but less effective.
Materials:
- Reflective bubble material (folds compactly)
- Mesh (allows visibility, reduces heat)
- Rigid panel (folds or collapses)
Top picks:
- EcoNour Windshield Sunshade (custom fit)
- Magnelex Jumbo Sunshade (large coverage)
- Enovoe Car Window Shade (side windows)
Pro tip: Use sunshades consistently during summer months to extend dashboard life and maintain comfortable interior temperatures.
Safety and Emergency Accessories
Prepare for unexpected situations with essential safety equipment.
23. Portable Tire Inflator
Why essential: Maintaining proper tire pressure improves fuel economy, extends tire life, and enhances safety. Portable inflators let you address low pressure anywhere.
Features to prioritize:
- Pressure range – Capable of 35+ PSI for proper inflation
- Inflation speed – Faster is more convenient
- Power source – 12V cigarette lighter or rechargeable battery
- Accuracy – Built-in pressure gauge should be reliable
- LED light – For nighttime use
- Auto shut-off – Stops at preset pressure
Top options:
AstroAI Portable Air Compressor – Affordable, reliable, decent speed. Digital pressure gauge. Cost: $25-40.
VIAIR 88P Portable Compressor – More powerful, faster inflation. Professional-grade quality. Cost: $60-80.
EPAuto 12V DC Portable Air Compressor – Best value option, good reviews. Cost: $30-40.
Pro tip: Check tire pressure monthly, including spare. Inflate when tires are cold for accurate readings.
24. Emergency Kit
Why necessary: Be prepared for breakdowns, accidents, or unexpected situations with comprehensive emergency equipment.
Essential items:
Jumper cables or jump starter – Dead batteries happen. Portable jump starters are more convenient than cables requiring another vehicle. Cost: $50-120.
First aid kit – Treat minor injuries. Cost: $20-50 for comprehensive kit.
Flashlight – LED flashlight with extra batteries or rechargeable. Cost: $15-50.
Reflective triangles or flares – Alert other drivers to your location if broken down. Cost: $15-30.
Basic tools – Screwdrivers, pliers, adjustable wrench for minor repairs. Cost: $30-60.
Tire repair kit – Plug kit for temporary tire repairs. Cost: $10-20.
Tow strap – For recovery if stuck. Cost: $20-40.
Blanket – For warmth if stranded in cold weather. Cost: $15-30.
Water and non-perishable snacks – For extended waits. Cost: varies.
Complete emergency kits are available (AAA kits, LIFELINE kits) providing all essentials in one package. Cost: $50-150.
Seasonal items:
- Winter – Ice scraper, snow brush, sand/salt, extra warm clothing
- Summer – Extra water, sun protection
Storage: Keep kit in cargo area, easily accessible. Check expiration dates on first aid supplies periodically.
25. Fire Extinguisher
Why important: Vehicle fires, while rare, are catastrophic. A small fire extinguisher can prevent total loss.
Specifications:
- Minimum 2.5 lb rated for automotive use
- ABC-rated (handles all fire types)
- Secure mounting – Must be easily accessible but won’t become projectile in accident
Cost: $20-50
Mounting locations:
- Under front seat
- In cargo area with quick-release mount
- On roll bar (if equipped)
Brands:
- First Alert
- Kidde
- Amerex
Inspection: Check pressure gauge monthly. Replace after use or if pressure drops.
Budget-Friendly Accessory Packages
For buyers wanting comprehensive accessory coverage at specific price points, here are suggested packages.
Essential Protection Package ($200-300)
Focus: Protect your investment with minimal spending
- All-weather floor mats (Husky Liners or similar): $100-130
- Cargo liner (budget option): $40-60
- Mud flaps (generic or OEM): $50-80
- Sunshade: $20-30
Total: ~$250
This package protects interior and exterior from damage while maintaining resale value.
Technology Upgrade Package ($400-600)
Focus: Modern tech conveniences
- Dash cam (VIOFO A129 or similar): $150-200
- Phone mount (iOttie): $25-35
- Wireless charging pad: $40-60
- Blind spot mirrors: $15-25
- LED interior lights upgrade: $30-50
- Portable tire inflator: $30-40
- Emergency kit: $50-80
Total: ~$500
Significantly enhances safety, convenience, and peace of mind.
Outdoor Adventure Package ($800-1,200)
Focus: Maximize cargo capacity and capability
- Roof rack cross bars (Yakima or similar): $300-400
- Cargo box (Yakima SkyBox 16): $400-500
- All-weather floor mats: $120-180
- Cargo liner: $80-120
- Mud flaps: $60-100
Total: ~$1,000
Perfect for outdoor enthusiasts needing maximum hauling capacity.
Premium Comfort Package ($600-900)
Focus: Luxury and convenience
- Premium leather seat covers (front pair): $250-350
- Rear seat entertainment (tablet mounts + tablets): $150-250
- Wireless charging pad: $60-90
- Center console organizer: $25-40
- Seatback organizers: $40-60
- Cargo organizer: $50-80
- Sunshades (complete set): $40-60
Total: ~$750
Transforms interior into comfortable, organized space ideal for families.
Complete Enthusiast Package ($2,000-3,500)
Focus: Comprehensive upgrades across all categories
- All protective accessories (mats, cargo liner, seat covers, mud flaps): $400-600
- Roof rack and cargo box: $700-900
- Trailer hitch and wiring: $350-500
- Dash cam system (dual): $250-350
- LED lighting upgrades (comprehensive): $150-250
- Running boards: $400-600
- Window deflectors: $80-120
- Emergency equipment (complete): $100-150
- Organization accessories: $100-150
Total: ~$2,800
This comprehensive approach fully customizes your RAV4 for maximum functionality and protection.
Installation Considerations
Understanding installation complexity helps you budget time and money appropriately.
DIY-Friendly Installations (15-60 minutes)
No tools required:
- Floor mats
- Cargo liner
- Seat covers (most types)
- Sunshades
- Phone mounts (adhesive or vent-clip)
- Cargo organizers
- Center console organizers
Basic hand tools only:
- Mud flaps (30-60 min)
- Roof rack cross bars (15-30 min)
- Dash cam (basic installation) (30-60 min)
- Window deflectors (stick-on type) (45-90 min)
- Blind spot mirrors (10 min)
- LED bulb replacements (15-30 min per location)
Moderate DIY Installations (1-3 hours)
Requires more tools/skills:
- Window deflectors (in-channel type)
- Cargo box mounting
- Running boards (if bolt-on design)
- Trailer hitch (experienced DIYers only)
- Dash cam hardwiring
These installations are manageable for those comfortable with hand tools and following detailed instructions, but professional installation ensures best results if you’re uncertain.
Professional Installation Recommended
Complex or requiring special tools:
- Trailer hitch and wiring ($150-300 labor)
- Running boards/nerf bars ($150-300 labor)
- Power running boards ($300-500 labor)
- Audio system upgrades ($200-500 labor)
- Dash cam hardwiring ($100-200 labor)
- Paint protection film ($500-1,500 labor for comprehensive coverage)
- Remote start systems ($150-300 labor)
Professional installation ensures proper mounting, electrical connections, and warranty protection. Factor these costs into your budget.
Tools You’ll Need
For DIY installations, these tools cover most projects:
Basic set:
- Socket set (metric sizes)
- Screwdriver set (Phillips and flathead)
- Trim removal tools
- Wire strippers and crimpers (for electrical)
- Multimeter (for electrical)
- Torque wrench
- Drill (occasionally needed)
Cost for quality basic tool set: $100-300 if starting from scratch
Pro tip: If an installation requires tools you don’t own and won’t use again, professional installation often costs less than buying tools plus your time investment.
Buying Accessories: Where and How
Navigate the accessory marketplace effectively to find quality products at fair prices.
Where to Buy RAV4 Accessories
Amazon – Largest selection, competitive prices, customer reviews, convenient returns. Watch for counterfeit products on third-party listings.
Local Toyota Dealer – Genuine OEM accessories guaranteed to fit perfectly and maintain warranty. Higher prices but peace of mind. Installation available.
AutoZone/O’Reilly/Advance Auto – Physical stores for immediate purchase. Can see/touch products before buying. Expert advice available.
Specialty retailers – REI (outdoor gear), Best Buy (electronics), 4 Wheel Parts (off-road accessories) offer curated selections with knowledgeable staff.
Manufacturer direct – Buy from WeatherTech, Thule, Yakima, etc. directly. Often same price as Amazon with expert customer service.
Used marketplaces – Facebook Marketplace, eBay, Craigslist for used accessories (roof racks, hitches, etc.). Significant savings but no warranty.
What to Look For
Fit: Ensure accessories are specifically designed for your RAV4 model year. “Universal fit” often means compromises.
Reviews: Read customer reviews thoroughly. Look for reviews with photos. Pay attention to negative reviews for recurring issues.
Brand reputation: Established brands (WeatherTech, Thule, Husky, etc.) charge premium prices but deliver quality and warranty support.
Warranty: Quality accessories include warranties. Avoid products without warranty coverage.
Return policy: Ensure you can return if fitment or quality doesn’t meet expectations.
Material quality: Cheap accessories save money upfront but fail quickly. Invest in quality for items you’ll use regularly.
Budget vs. Premium: Making Smart Choices
Worth paying premium for:
- Items directly impacting safety (dash cams, emergency equipment)
- Protection accessories (floor mats, cargo liners, seat covers)
- Frequently used items (phone mounts, organizational tools)
- Permanent installations (roof racks, hitches)
Where budget options work:
- Organizational accessories
- Sunshades
- Some styling accessories
- Items you’re unsure you’ll use long-term
False economy: The cheapest option that fails in six months costs more than mid-priced quality that lasts years.
Avoiding Common Mistakes
Mistake 1: Buying before measuring – Always verify dimensions and compatibility with your specific model year.
Mistake 2: Ignoring weight ratings – Roof racks, hitches, and cargo carriers have weight limits. Exceeding limits is dangerous and can damage your vehicle.
Mistake 3: Over-accessorizing – Don’t buy accessories just because they exist. Focus on items that genuinely improve your ownership experience.
Mistake 4: Sacrificing quality for price – Cheap floor mats that smell, don’t fit properly, and wear out in six months aren’t savings.
Mistake 5: Forgetting installation costs – Factor professional installation into budget for complex accessories.
Mistake 6: Impulse purchases – Research thoroughly before buying. Read multiple reviews, watch installation videos, and consider alternatives.
Maintenance and Care for Accessories
Proper maintenance extends accessory life and preserves their benefits.
Floor Mats and Liners
Cleaning:
- Remove monthly
- Shake out loose debris
- Spray with hose
- Scrub stubborn stains with mild soap
- Dry completely before reinstalling
- Never put rubber mats in washing machines
Winter care: Remove ice buildup before bringing into warm garage. Moisture from melting ice can damage carpeting if trapped under mats.
Roof Racks and Cargo Boxes
Maintenance:
- Check mounting torque every 1,000 miles initially, then quarterly
- Inspect for cracks or damage
- Clean regularly (road salt is corrosive)
- Lubricate moving parts annually
- Remove when not in use to reduce wear and improve fuel economy
Storage: When removed, store in dry location away from direct sunlight. UV exposure degrades plastic components.
Trailer Hitches
Inspection:
- Check mounting bolts for tightness monthly when in use
- Inspect for rust or corrosion
- Lubricate ball mount and receiver
- Clean mud and debris after off-road use
- Spray with rust preventative if stored in humid climates
Electrical: Test trailer lights before each use. Clean electrical connections annually.
Electronic Accessories
Dash cams:
- Format SD card monthly for optimal performance
- Clean lens quarterly
- Update firmware when available
- Check mounting adhesive integrity
- Replace SD cards annually (they wear out)
Phone mounts:
- Clean adhesive surfaces if using suction mounts
- Check tightness of adjustments
- Replace worn grip pads
Seat Covers
Fabric covers:
- Vacuum regularly
- Spot clean spills immediately
- Machine wash according to manufacturer instructions (usually every 3-6 months)
Leather/leatherette:
- Wipe clean with damp cloth
- Condition every 3-6 months
- Avoid harsh chemicals
Neoprene:
- Hose down or machine wash as needed
- Air dry completely before reinstalling
LED Lights
Maintenance:
- Check function regularly
- Clean lens/housing to maintain brightness
- Inspect for moisture in housings (indicates seal failure)
- Replace failed bulbs promptly
LEDs last 25,000-50,000 hours typically but can fail prematurely due to heat or poor quality.
Accessory Compatibility Considerations
Understanding compatibility prevents costly mistakes.
Model Year Differences
The RAV4 underwent significant redesign between generations:
Fifth generation (2019-present) – Current design with significant differences from previous generation Fourth generation (2013-2018) – Completely different dimensions and mounting points Earlier generations – Each has unique specifications
Always verify your exact model year when purchasing accessories. A roof rack designed for 2018 won’t fit 2019+.
Trim Level Variations
Different trims have slight variations affecting accessory compatibility:
Roof rails – Some trims include roof rails, others don’t. Cross bars require rails.
Technology packages – Radar cruise control sensors affect dash cam and phone mount placement.
Wheel size – Different trims have 17″, 18″, or 19″ wheels affecting tire-related accessories.
Paint protection film – Front end design varies slightly between trims (Adventure vs. Limited).
AWD vs. FWD
Usually minimal impact, but:
- Slight ground clearance difference
- Some aftermarket suspension components differ
- Exhaust routing may vary
Hybrid and Prime Differences
RAV4 Hybrid and Prime have unique considerations:
Battery location – Affects trailer hitch installation Weight – Heavier than gasoline model (affects some cargo capacity) Undercarriage – Different exhaust routing and components
Always verify hybrid/Prime compatibility for hitches and undercarriage accessories.
Warranty and Insurance Implications
Understand how accessories affect coverage.
Vehicle Warranty
OEM accessories purchased from Toyota dealer typically don’t void warranty and may have their own warranty coverage.
Aftermarket accessories can void warranty coverage for related components if they cause damage. For example:
- Trailer hitch installation that damages frame could void frame warranty
- Aftermarket suspension lifts typically void suspension warranty
- Electrical accessories causing system damage void electrical warranty
Magnuson-Moss Warranty Act protects consumers—manufacturers can’t void entire warranty due to aftermarket accessories unless they prove the accessory caused the failure.
Best practice: Keep receipts and documentation for all accessories and installation. Use reputable installers for complex work.
Insurance
Increased coverage needs:
- Expensive accessories (roof racks, audio systems, premium wheels) should be documented with your insurer
- Some accessories (roof cargo, bike racks with bikes) may need additional coverage
- Modifications can increase or decrease premiums
Dash cam discounts – Many insurers offer discounts for dash cam installation. Ask your agent.
Lowering premiums – Some accessories (security systems, tracking devices) may reduce insurance costs.
Best practice: Contact your insurance agent before major accessory purchases to understand coverage implications.
Environmental and Efficiency Considerations
Some accessories affect fuel economy and environmental impact.
Fuel Economy Impact
Significant impact (3-10% reduction):
- Roof racks and cargo boxes
- Large mud flaps
- Aggressive tire choices
- Heavy wheels
Minimal impact (0-3% reduction):
- Running boards
- Window deflectors
- Trailer hitch (when not towing)
- Most interior accessories
Mitigation strategies:
- Remove roof accessories when not in use
- Choose aerodynamic designs
- Maintain proper tire pressure
- Avoid excessive weight
Eco-Friendly Accessory Choices
Sustainable options:
- Recycled materials (some floor mats use recycled rubber)
- Long-lasting quality accessories (reduce replacement frequency)
- Local products (reduced shipping emissions)
- Multi-purpose accessories (reduce total number needed)
Avoid:
- Disposable accessories requiring frequent replacement
- Products with excessive packaging
- Items encouraging wasteful behavior
Future-Proofing Your Accessory Purchases
Maximize long-term value from accessory investments.
Consider Transferability
Easily transferable to future vehicles:
- Portable tire inflators
- Emergency kits
- Dash cams (usually)
- Phone mounts
- Cargo organizers (universal types)
Vehicle-specific (limited transferability):
- Custom-fit floor mats
- Running boards
- Roof racks (sometimes transferable with adapter kits)
- Trailer hitches
When choosing between similar accessories, slight preference to transferable options adds long-term value.
Quality Over Trends
Avoid accessories that:
- Follow fleeting styling trends
- Use proprietary systems likely to become obsolete
- Are cheaply made despite appearing trendy
Choose timeless, functional options that will remain useful regardless of changing trends.
Check for Updates and Upgrades
Some accessory categories evolve rapidly:
- Dash cam technology improves yearly
- Phone mounts adapt to new phone designs
- Charging technologies advance
Strategy: Start with affordable options in rapidly-evolving categories, invest in premium for stable categories (floor mats, cargo liners, roof racks).
Frequently Asked Questions
What are the most essential accessories for a new RAV4?
All-weather floor mats, cargo liner, and dash cam form the essential trio. These protect your investment, document events, and enhance daily usability immediately.
Can I install most RAV4 accessories myself?
Yes, many accessories (floor mats, cargo liners, phone mounts, organizers, sunshades) install without tools in minutes. Complex installations (hitches, running boards, audio) typically require professional installation.
Do aftermarket accessories void my Toyota warranty?
Generally no, but accessories that cause damage can void warranty coverage for related components. OEM accessories from Toyota dealers don’t typically affect warranty. Keep documentation of all installations.
What’s the best brand for RAV4 floor mats?
WeatherTech offers premium quality with excellent fit, Husky Liners provides similar protection at lower cost, and 3D MAXpider offers unique styling. All three are excellent choices.
Are roof racks worth the investment?
If you regularly transport bikes, kayaks, cargo boxes, or bulky items, absolutely. For occasional use, consider whether rental options or alternative transportation methods might be more economical.
How much do trailer hitches cost installed?
Expect $300-600 total for quality hitch with professional installation and wiring. Class II hitches appropriate for RAV4 towing capacity cost $180-300 for parts plus $150-300 labor.
What accessories improve resale value?
All-weather floor mats, roof racks, trailer hitches, and protective accessories (cargo liners, mud flaps) typically increase resale value by maintaining vehicle condition and adding desirable functionality.
Do I need mud flaps if I don’t go off-road?
Yes, mud flaps protect paint from road debris, rock chips, and salt even in purely urban environments. They’re particularly valuable in winter climates with road salt.
Can I add wireless charging to older RAV4 models?
Yes, aftermarket wireless charging pads install in older RAV4s. Some integrate into center console area, others are portable pads that sit in cup holders or on dash.
What accessories do I need for camping with a RAV4?
Roof rack with cargo box, trailer hitch for small camper, cargo organizer, all-weather floor mats, cargo liner, emergency kit, and portable tire inflator form a complete camping setup.
Are expensive dash cams worth the extra cost?
Premium dash cams offer better image quality (critical for reading license plates), more reliable operation, better low-light performance, and advanced features like parking mode. For peace of mind and evidence quality, premium options are worthwhile.
How often should I replace accessories?
Quality floor mats and cargo liners last 5-10+ years. Seat covers depend on material and use (3-7 years typical). Electronic accessories have varying lifespans (dash cams 3-5 years, phone mounts 2-4 years). Emergency kit components should be checked annually.
Can I use RAV4 accessories from previous generation?
Generally no. The 2019+ RAV4 has completely different dimensions and mounting points than 2018 and older. Always verify compatibility with your specific model year.
Do window deflectors really reduce wind noise?
Yes, quality window deflectors allow windows to be cracked open with minimal additional wind noise, particularly at highway speeds. They’re especially valuable for those who enjoy fresh air circulation.
What accessories should I avoid?
Avoid extremely cheap no-name brands (they often don’t fit properly or fail quickly), purely cosmetic accessories with no function, accessories that obstruct safety features or visibility, and anything marketed with exaggerated claims.
Additional Resources
For more information on Toyota RAV4 accessories and modifications:
Toyota Accessories Website – Official Toyota OEM accessories designed specifically for the RAV4 with guaranteed fitment and quality.
RAV4World.com Forums – Active community of RAV4 owners sharing accessory reviews, installation guides, and real-world experiences.
YouTube – Numerous channels feature RAV4 accessory reviews and installation tutorials. Search for “RAV4 [accessory name] review” for video demonstrations before purchasing.
Your Local Toyota Dealer – Parts department can provide information on OEM accessories, installation services, and compatibility with your specific RAV4 configuration.
Conclusion: Building Your Perfect RAV4
The Toyota RAV4’s versatility stems not just from its excellent factory configuration but from its vast ecosystem of accessories that allow customization for any lifestyle or need. Whether you prioritize protection, capability, technology, comfort, or style, the right combination of accessories transforms your RAV4 into the perfect vehicle for your specific requirements.
Key principles for successful accessorizing:
Start with protection – Floor mats, cargo liner, and mud flaps preserve your investment and should be priority purchases for any RAV4 owner.
Prioritize safety and emergency preparedness – Dash cams, emergency kits, and tire inflators provide peace of mind and practical value when needed.
Buy quality in high-use categories – Items you’ll use daily or weekly justify premium investment. Quality floor mats last years and perform better than cheap alternatives that need frequent replacement.
Consider your actual usage patterns – Don’t buy roof racks if you only haul bikes twice yearly. Don’t skip them if you’re an outdoor enthusiast who transports gear weekly. Match accessories to reality, not aspirations.
Professional installation for complex items – While DIY saves money, professional installation ensures proper mounting, electrical connections, and warranty protection for complex accessories.
Maintain accessories properly – Even the best accessories need occasional cleaning, inspection, and maintenance to deliver long-term value.
Think long-term – Quality accessories maintain value, enhance resale, and improve ownership experience throughout your vehicle’s life. The small premium for quality pays dividends over years of use.
The RAV4’s combination of reliability, versatility, and broad accessory compatibility explains why it consistently ranks as America’s best-selling non-pickup vehicle. By thoughtfully selecting accessories aligned with your needs and maintaining them properly, you’ll maximize the enjoyment and utility of your RAV4 for years to come.
Whether you implement the entire enthusiast package or select just a few essential items, even modest accessory investments significantly enhance your ownership experience—making every drive more convenient, comfortable, and enjoyable while protecting your investment for the long term.