Table of Contents
How to Reset Tire Pressure Light on Toyota RAV4: Complete Guide for All Model Years
The Toyota RAV4 is one of America’s best-selling SUVs, known for its reliability, versatility, and comprehensive safety features. Among these features is the Tire Pressure Monitoring System (TPMS), a federally mandated safety system that alerts drivers when tire pressure drops below safe levels. While this system provides valuable safety information, the tire pressure warning light can sometimes remain illuminated even after you’ve addressed the underlying pressure issue—requiring a manual reset to clear the warning.
Understanding how to properly reset the tire pressure light in your Toyota RAV4 is an essential skill for any owner. The reset process varies depending on your model year, and performing it incorrectly can leave you with a persistent warning light or, worse, a system that fails to alert you to actual pressure problems. This comprehensive guide walks you through the reset procedures for every RAV4 generation, explains why the light comes on in the first place, troubleshoots common issues, and provides maintenance tips to keep your TPMS functioning properly.
Whether you’re dealing with a stubborn warning light that won’t turn off, have just rotated your tires, or simply want to understand your RAV4’s tire pressure monitoring system better, this guide provides the detailed, step-by-step information you need to resolve TPMS issues and maintain optimal tire safety.
Understanding the Tire Pressure Monitoring System (TPMS)
Before diving into reset procedures, understanding how your RAV4’s TPMS works helps you diagnose issues and perform resets correctly.
What is TPMS and Why Does It Matter?
The Tire Pressure Monitoring System is an electronic system designed to monitor air pressure inside your tires and alert you when pressure falls significantly below the recommended level. The TPMS became mandatory on all new vehicles sold in the United States starting with the 2008 model year, following the TREAD Act passed in response to tire-related accidents.
Why Proper Tire Pressure Matters:
Safety: Underinflated tires compromise vehicle handling, increase stopping distances, and can lead to tire blowouts—particularly at highway speeds. The TPMS provides an early warning before pressure drops to dangerous levels.
Fuel Efficiency: Tires lose approximately 0.2% fuel efficiency for every 1 PSI drop in pressure. Properly inflated tires can improve fuel economy by up to 3%, saving money and reducing environmental impact.
Tire Longevity: Underinflated tires wear unevenly and faster than properly inflated tires. Maintaining correct pressure can extend tire life by thousands of miles.
Performance: Tire pressure affects acceleration, braking, cornering, and ride quality. Proper inflation ensures your RAV4 performs as designed.
How TPMS Works in Toyota RAV4
Toyota RAV4 models use direct TPMS, meaning each wheel has a sensor mounted inside the tire that directly measures air pressure and transmits that information wirelessly to the vehicle’s computer.
System Components:
Tire Pressure Sensors: Each wheel contains a battery-powered sensor that measures pressure and temperature. These sensors transmit data via radio frequency to the receiver.
TPMS Receiver/Module: Located in the vehicle, this module receives signals from all four sensors (plus the spare, if equipped) and processes the data.
Warning System: When pressure drops below the threshold (typically 25% below the recommended pressure), the system illuminates the warning light on your dashboard.
Sensor Battery Life: TPMS sensors contain batteries that typically last 7-10 years. When batteries fail, sensors must be replaced—they cannot be recharged.
The TPMS Warning Light Explained
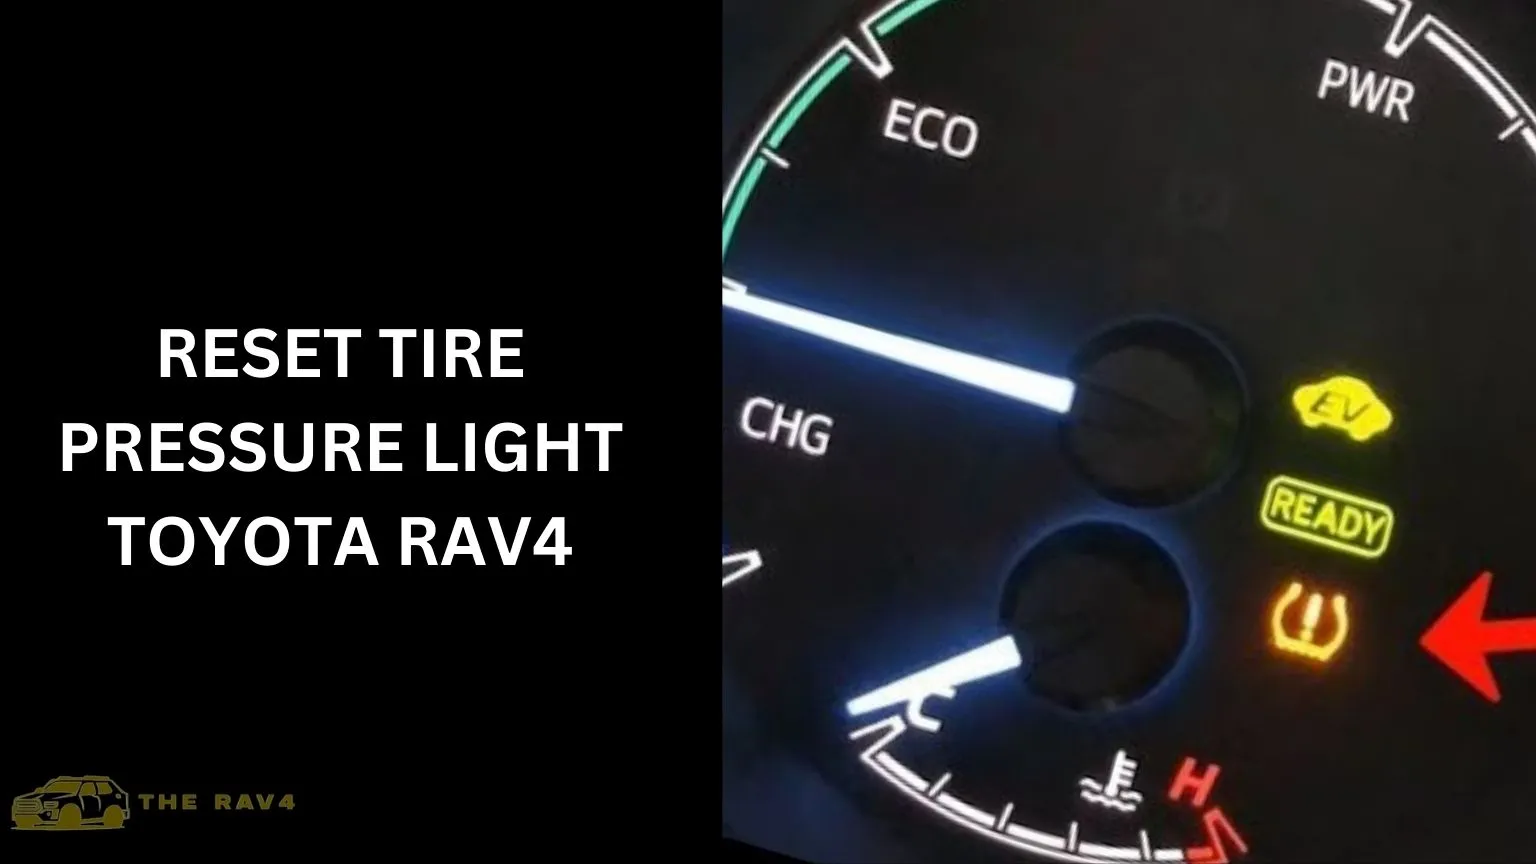
The TPMS warning light appears on your dashboard as an exclamation point inside a horseshoe-shaped symbol (resembling a tire cross-section). Understanding what different light behaviors mean helps diagnose issues:
Solid Light (Stays On):
- One or more tires has low pressure
- Pressure has dropped 25% or more below recommended level
- Action: Check and inflate all tires to proper pressure
Flashing Light (Then Stays Solid):
- TPMS system malfunction
- Possible sensor failure or communication issue
- Action: Have system diagnosed by qualified technician
Light Comes On Intermittently:
- Borderline pressure—possibly fluctuating with temperature
- May indicate slow leak
- Action: Check pressure when tires are cold; look for leaks
Light Comes On in Cold Weather:
- Normal—air contracts when cold, reducing pressure
- Pressure may return to normal as tires warm
- Action: Check and adjust pressure; consider seasonal inflation adjustment
Why the TPMS Light Comes On in Your Toyota RAV4
Understanding the causes of TPMS warnings helps you address the underlying issue before resetting the light.
Low Tire Pressure
The most common and intended reason for the TPMS light is actual low tire pressure.
Causes of Pressure Loss:
Gradual Permeation: All tires naturally lose 1-2 PSI per month as air permeates through the rubber. This is normal and requires periodic inflation.
Temperature Changes: Tire pressure changes approximately 1 PSI for every 10°F change in ambient temperature. A 30-degree temperature drop (common during seasonal changes) can reduce pressure by 3 PSI—enough to trigger the warning in borderline situations.
Punctures and Leaks: Nails, screws, glass, and other debris can puncture tires, causing slow or rapid pressure loss.
Bead Leaks: The seal between tire and wheel rim can develop leaks, particularly on older wheels or after hitting potholes.
Valve Stem Issues: Damaged or deteriorating valve stems can leak air, especially the rubber stems common on many vehicles.
Recommended Pressure for RAV4: The recommended tire pressure for your specific RAV4 is listed on the tire information placard located on the driver’s door jamb. Common specifications:
| Model Years | Front Pressure | Rear Pressure |
|---|---|---|
| 2019-2025 | 33-35 PSI | 33-35 PSI |
| 2013-2018 | 32-35 PSI | 32-35 PSI |
| 2006-2012 | 30-33 PSI | 30-33 PSI |
Always refer to your specific vehicle’s door placard for exact specifications.
Faulty TPMS Sensor
TPMS sensors can malfunction, causing false warnings or system errors.
Common Sensor Issues:
Dead Battery: Sensor batteries last 7-10 years and cannot be replaced—the entire sensor must be replaced when the battery dies.
Physical Damage: Sensors can be damaged during tire mounting/dismounting, from hitting curbs, or from corrosion.
Signal Interference: Electronic interference from other devices can occasionally disrupt sensor communication.
Sensor Not Registered: After sensor replacement or tire rotation, sensors may need to be relearned by the system.
Signs of Sensor Problems:
- TPMS light flashes for 60-90 seconds then stays solid
- Warning persists despite correct tire pressure
- Erratic readings on vehicles with pressure displays
- Warning appears for only one tire consistently
Temperature Fluctuations
Temperature-related pressure changes are among the most common TPMS triggers, particularly during seasonal transitions.
The Science: Air is a gas that expands when heated and contracts when cooled. Your tires were likely inflated during different temperature conditions than current conditions.
Seasonal Patterns:
Fall/Winter: As temperatures drop, pressure decreases. Tires inflated to 33 PSI on a 70°F day may read 30 PSI when temperatures drop to 40°F—potentially triggering the warning.
Spring/Summer: Rising temperatures increase pressure. This rarely triggers warnings but can lead to overinflation if tires were filled during cold weather.
Daily Fluctuations: Large temperature swings between day and night can cause intermittent warnings, particularly in desert climates.
Solution: Check and adjust tire pressure seasonally, and consider inflating slightly higher (within safe limits) during fall to account for coming temperature drops.
After Tire Service
The TPMS light commonly illuminates after tire-related service:
Tire Rotation: Moving tires to different positions can require sensor relearning on some systems.
New Tires: Installing new tires requires proper sensor reinstallation and may require system reset.
Tire Repair: Dismounting tires for repair can affect sensors or require recalibration.
Wheel Changes: Switching to winter wheels or aftermarket wheels affects TPMS operation.
Service-Related Issues:
- Sensor damaged during tire work
- Sensor not properly reinstalled
- System not reset after service
- Incorrect sensor programming
Always request TPMS verification after any tire service to ensure the system functions properly.
How to Reset Tire Pressure Light on Toyota RAV4
The reset procedure varies by model year and generation. Follow the instructions specific to your RAV4.
Reset Method for 2019-2025 RAV4 (Fifth Generation)
Fifth-generation RAV4 models use the infotainment system for TPMS reset.
Before Starting:
- Inflate all tires to the pressure specified on the door jamb placard
- Park the vehicle in a safe location
- Ensure the vehicle is in Park with the parking brake engaged
Reset Procedure (Touchscreen Method):
Step 1: Turn the ignition to the “ON” position without starting the engine. For push-button start models, press the Start button twice without pressing the brake pedal.
Step 2: From the home screen, navigate to “Settings” (gear icon) on the touchscreen display.
Step 3: Select “Vehicle Settings” from the menu options.
Step 4: Scroll to find “TPMS” or “Tire Pressure Monitor” option.
Step 5: Select “Set Pressure” or “Reset” option.
Step 6: Confirm the reset when prompted. A message will indicate the reset is in progress.
Step 7: Start the engine and drive the vehicle for approximately 10-25 minutes at speeds above 25 mph. The system needs driving time to calibrate the new baseline pressures.
Step 8: Verify the TPMS light has turned off. If it remains on, repeat the process or check tire pressures again.
Alternative Method (If Reset Option Not in Menu):
Some 2019-2020 models may have a physical reset button:
- Locate the TPMS reset button below the steering wheel (driver’s side, near the hood release)
- Turn ignition to “ON” without starting engine
- Press and hold the TPMS reset button until the TPMS indicator light blinks three times
- Release the button
- Start engine and drive to complete calibration
Reset Method for 2013-2018 RAV4 (Fourth Generation)
Fourth-generation RAV4 models typically use a physical reset button.
Before Starting:
- Inflate all tires to recommended pressure
- Vehicle in Park with parking brake engaged
Reset Procedure:
Step 1: Turn the ignition key to the “ON” position without starting the engine. For push-button start, press Start button twice without pressing the brake.
Step 2: Locate the TPMS reset button. Common locations include:
- Below the steering wheel on the left side of the dash
- Inside the glove compartment
- To the left of the steering column near the hood release
Step 3: Press and hold the TPMS reset button. The button is typically small and may require a pen or similar object to press.
Step 4: Continue holding until the TPMS warning light blinks three times (approximately 3-5 seconds).
Step 5: Release the button immediately after the third blink.
Step 6: Start the engine and drive the vehicle for at least 25 minutes at speeds above 25 mph to allow the system to recalibrate.
Step 7: Verify the TPMS light has turned off after driving. If it remains on, check all tire pressures and repeat the reset process.
If You Can’t Find the Reset Button:
On some 2013-2018 models, the reset may be performed through the Multi-Information Display:
- Use the steering wheel controls to navigate to “Settings”
- Scroll to “TPMS” or “Tire Pressure”
- Select “Set” or “Initialize”
- Confirm the selection
- Drive to complete calibration
Reset Method for 2006-2012 RAV4 (Third Generation)
Third-generation RAV4 models use a physical reset button located in the glove compartment or below the steering wheel.
Reset Procedure:
Step 1: Ensure all tires are inflated to the correct pressure as specified on the door placard.
Step 2: Turn the ignition to the “ON” position (engine off).
Step 3: Locate the TPMS reset button:
- Check inside the glove compartment (may be on the left wall)
- Look below the steering wheel near the hood release
- Consult your owner’s manual if not immediately visible
Step 4: Press and hold the reset button until the TPMS indicator light blinks slowly three times.
Step 5: Release the button.
Step 6: Turn ignition off, then start the engine.
Step 7: Drive for approximately 30 minutes at highway speeds to allow complete system calibration.
Note for 2006-2007 Models: Early third-generation models may require a different procedure. If the above steps don’t work, try:
- Disconnect the negative battery cable for 10 minutes
- Reconnect battery
- Turn ignition to ON
- Locate and press the TPMS reset button
- Drive to recalibrate
Reset Method for 2001-2005 RAV4 (Second Generation)
TPMS was not standard on second-generation RAV4 models (it became mandatory in 2008). However, some late second-generation models (primarily 2004-2005) may have TPMS as optional equipment.
If Your 2004-2005 RAV4 Has TPMS:
- Inflate all tires to recommended pressure
- Turn ignition to ON (engine off)
- Locate the TPMS reset button (typically below dash or in glove box)
- Press and hold until light blinks three times
- Drive to recalibrate
If Your RAV4 Doesn’t Have a TPMS Button: Your vehicle may not be equipped with TPMS. If you see a tire pressure warning light, it may indicate a different system (such as a low-tire-pressure indicator on the spare tire). Consult your owner’s manual for clarification.
Using a TPMS Reset Tool
For stubborn TPMS lights or when the standard reset doesn’t work, a TPMS reset tool can be helpful.
What TPMS Reset Tools Do:
- Communicate directly with TPMS sensors
- Read sensor IDs and pressure readings
- Trigger sensors to transmit
- Reprogram the vehicle’s TPMS module
- Register new sensors after replacement
How to Use a TPMS Reset Tool:
Step 1: Purchase a compatible TPMS tool. Options range from simple trigger tools ($30-50) to professional diagnostic tools ($200+). Ensure compatibility with your RAV4 model year.
Step 2: Inflate all tires to proper pressure.
Step 3: Connect the tool to the OBD-II port located under the dashboard on the driver’s side.
Step 4: Follow the tool’s instructions, which typically involve:
- Selecting your vehicle make and model
- Choosing “TPMS Reset” or “Sensor Learn” mode
- Triggering each sensor in sequence (some tools require holding the tool near each tire)
- Confirming successful sensor registration
Step 5: Complete the driving procedure to finalize calibration.
Recommended TPMS Tools:
- Autel MaxiTPMS TS401 (professional quality)
- ATEQ VT56 (industry standard)
- Launch CRP123 (includes TPMS functions)
- VXDAS TPMS Relearn Tool (budget-friendly)
Step-by-Step Troubleshooting Guide
When the standard reset doesn’t work, systematic troubleshooting helps identify the underlying issue.
Step 1: Verify All Tire Pressures
Before any reset attempt, confirm actual tire pressures:
Proper Checking Procedure:
- Check tires when cold (vehicle sitting 3+ hours or driven less than 1 mile)
- Use a quality tire pressure gauge (digital gauges are most accurate)
- Check all four tires plus the spare (if equipped with TPMS sensor)
- Compare readings to the door placard specification
- Inflate or deflate as needed to match specification exactly
Don’t Forget the Spare: Many RAV4 models include a TPMS sensor in the spare tire. A low spare tire can trigger the warning even if all four road tires are properly inflated.
Spare Tire Location:
- Most RAV4 models: Mounted under the rear cargo area
- Some models: Mounted inside cargo area
- Check spare tire pressure—often overlooked during regular checks
Step 2: Check for Obvious Issues
Visual Inspection:
- Look for nails, screws, or other objects embedded in tires
- Check for sidewall damage or bulges
- Inspect valve stems for cracks or damage
- Look for signs of bead leaks (dirt/moisture marks at tire/rim junction)
Listen for Leaks:
- In a quiet environment, listen for hissing sounds
- Apply soapy water to suspected leak areas and watch for bubbles
Check Valve Stems:
- Ensure valve caps are installed (protects against debris and moisture)
- Check that valve cores are tight (can be tightened with valve core tool)
- Look for cracked or deteriorated rubber valve stems
Step 3: Attempt Standard Reset Procedure
Follow the reset procedure specific to your model year (detailed above). Ensure you:
- Have ignition in correct position (ON, not ACC or START)
- Press and hold button long enough (until three blinks)
- Don’t start engine until reset is complete
- Drive long enough for calibration (25-30 minutes minimum)
Step 4: Try Alternative Reset Methods
If standard reset fails:
Battery Disconnect Method:
- Turn off ignition and remove key
- Disconnect negative battery terminal
- Press brake pedal for 30 seconds (discharges residual power)
- Wait 10 minutes
- Reconnect battery terminal
- Turn ignition to ON
- Attempt standard reset procedure
- Drive to recalibrate
Multiple Reset Attempts: Sometimes the system requires multiple resets:
- Perform reset procedure
- Drive 5-10 minutes
- Stop and turn off ignition
- Repeat reset procedure
- Drive again
Cycling Through All Modes:
- Turn ignition to ON
- Cycle to ACC
- Return to ON
- Perform reset procedure
Step 5: Check for System Malfunctions
If the light flashes then stays solid, or if multiple resets fail:
Sensor Issues:
- One or more sensors may have dead batteries
- Sensor damage from tire service
- Sensor not properly programmed to vehicle
System Diagnostic:
- Some TPMS tools can read sensor status
- Dealerships can perform comprehensive TPMS diagnosis
- Error codes may indicate specific sensor failures
When to Seek Professional Help:
- Light continues flashing (system malfunction)
- Reset procedures don’t work after multiple attempts
- Pressure readings on display are clearly incorrect
- Light returns shortly after successful reset
- Vehicle was in an accident that may have damaged sensors
Step 6: Professional Diagnosis
When DIY troubleshooting fails, professional diagnosis is necessary:
What the Dealer Can Do:
- Read TPMS diagnostic trouble codes
- Check individual sensor function and battery status
- Verify sensor programming to vehicle
- Replace faulty sensors
- Reprogram system after repairs
Expected Costs:
- TPMS diagnostic: $50-100
- Single sensor replacement: $50-150 (parts) + $30-75 (labor)
- Full sensor set replacement: $200-500 (parts) + $100-200 (labor)
- Sensor battery typically cannot be replaced—full sensor replacement required
Common Mistakes to Avoid
Understanding common errors helps ensure successful TPMS reset and maintenance.
Ignoring the Warning Light
The Mistake: Dismissing the TPMS light as a minor annoyance or “sensor glitch.”
Why It’s Dangerous:
- Actual low pressure may exist, compromising safety
- Continued driving on low tires causes damage
- Problems worsen over time
- May mask a slow leak leading to sudden failure
Best Practice: Always investigate TPMS warnings promptly. Check tire pressure whenever the light illuminates, even if you suspect a sensor issue.
Inflating to Incorrect Pressure
The Mistake: Inflating to the pressure stamped on the tire sidewall or guessing at correct pressure.
Why It’s Wrong:
- Sidewall pressure is maximum pressure, not recommended pressure
- Overinflation causes harsh ride, center tire wear, and reduced traction
- Underinflation causes poor fuel economy, edge wear, and heat buildup
- Incorrect pressure prevents proper TPMS calibration
Best Practice: Always use the pressure specified on the driver’s door jamb placard. This pressure is engineered for your specific vehicle.
Checking Pressure When Tires Are Warm
The Mistake: Checking tire pressure immediately after driving or when tires are warm.
Why It’s Inaccurate:
- Warm tires can read 4-6 PSI higher than cold
- Inflating to placard pressure when warm results in underinflation
- Inconsistent readings make it difficult to identify problems
Best Practice: Check pressure when tires are cold—before driving or after sitting for at least 3 hours. If you must check after driving, add 4 PSI to the placard specification for comparison, but don’t adjust inflation based on warm readings.
Forgetting the Spare Tire
The Mistake: Checking only the four road tires, forgetting the spare.
Why It Matters:
- Many RAV4 models have TPMS sensors in the spare
- Low spare pressure triggers the warning
- Often overlooked during regular checks
- Spare may not be usable when needed if neglected
Best Practice: Include the spare tire in every pressure check. The spare typically requires the same pressure as the road tires.
Not Driving After Reset
The Mistake: Expecting the light to turn off immediately after pressing the reset button.
Why Driving Is Required:
- Reset initiates the calibration process but doesn’t complete it
- System must sample pressure from all sensors during driving
- Vehicle speed and distance trigger calibration completion
- Without driving, system cannot establish new baseline
Best Practice: After resetting, drive for at least 25-30 minutes at speeds above 25 mph. Highway driving works best for rapid calibration.
Skipping the Reset After Tire Service
The Mistake: Assuming the TPMS will automatically recalibrate after tire rotation, new tires, or other service.
Why Reset May Be Needed:
- Sensor positions change during rotation
- New tires may have different characteristics
- Service may have interrupted sensor communication
- System may have stored error codes
Best Practice: After any tire service, verify TPMS function. If the light illuminates or displays seem incorrect, perform a reset.
Tips for Maintaining Optimal Tire Pressure
Proper tire maintenance reduces TPMS issues and extends tire life.
Regular Pressure Checks
Recommended Frequency:
- Monthly: Check all tires (including spare) at least once per month
- Before Long Trips: Check before highway driving or extended trips
- Seasonal Changes: Check when temperatures shift significantly
- After TPMS Warning: Check immediately when light illuminates
Establishing a Routine:
- Pick a regular day (first of month, payday, etc.)
- Keep a tire gauge in your vehicle
- Check before your first drive of the day
- Record readings to track trends
Using Quality Tire Pressure Gauges
Gauge Types:
Digital Gauges ($10-30):
- Most accurate for consumer use
- Easy to read display
- Battery-powered
- Recommended for most drivers
Dial/Analog Gauges ($10-25):
- No batteries required
- Durable and reliable
- Slightly harder to read precisely
- Good backup option
Stick/Pencil Gauges ($2-5):
- Least accurate
- Easy to lose calibration
- Acceptable for rough checks
- Not recommended for precise adjustment
Recommended Gauges:
- Accutire MS-4021B (digital)
- Milton S-921 (dial)
- JACO ElitePro (digital)
- Intercomp 360060 (racing-quality)
Seasonal Pressure Adjustments
Fall/Winter Preparation:
- As temperatures drop, pressure decreases
- Check pressure as weather cools
- Consider inflating 1-2 PSI above placard specification (within safe limits)
- Recheck after first cold snap
Spring/Summer Adjustment:
- Rising temperatures increase pressure
- Check pressure as weather warms
- Release excess pressure if above placard specification
- Monitor during hot weather for overinflation
Understanding Temperature Effects: Pressure changes approximately 1 PSI for every 10°F temperature change:
- 70°F day: 33 PSI
- 40°F morning: ~30 PSI (3 PSI drop)
- 100°F afternoon: ~36 PSI (3 PSI rise)
Tire Inspection and Maintenance
Regular Visual Inspection:
- Check tread depth (minimum 2/32″ legal, 4/32″ recommended for wet traction)
- Look for uneven wear patterns (indicates alignment or balance issues)
- Inspect sidewalls for cuts, bulges, or cracking
- Check for embedded objects
Rotation Schedule:
- Rotate tires every 5,000-7,500 miles
- Maintains even wear across all tires
- May require TPMS reset after rotation
Wheel and Valve Maintenance:
- Clean wheel surfaces during tire rotation
- Replace valve stems during tire replacement
- Install valve caps to protect cores
- Check for corrosion on wheel rims
Nitrogen Inflation
What Is Nitrogen Inflation: Some tire shops offer nitrogen filling instead of regular air. Nitrogen molecules are larger and escape through tire rubber more slowly.
Potential Benefits:
- More stable pressure (less affected by temperature)
- Slower pressure loss over time
- Reduced rim oxidation
Considerations:
- Modest benefit for most drivers
- More expensive than air ($5-10 per tire)
- Must be topped off with nitrogen for full benefit
- Regular air works fine for normal use
Recommendation: Nitrogen is beneficial but not essential. Regular air with monthly pressure checks provides equivalent safety for most drivers.
TPMS Sensor Replacement Guide
When sensors fail, replacement is necessary to restore proper TPMS function.
Signs That Sensors Need Replacement
Indicators of Sensor Failure:
- TPMS light flashes at startup then stays solid
- System reports fault code for specific sensor
- Sensor stop transmitting (visible with TPMS tool)
- Vehicle age exceeds typical sensor battery life (7-10 years)
- Persistent warnings despite correct pressure
Age Consideration: If your RAV4 is approaching 8-10 years old with original sensors, proactive replacement during tire service can prevent future issues.
Types of TPMS Sensors
OEM (Original Equipment Manufacturer) Sensors:
- Made to Toyota specifications
- Guaranteed compatibility
- Typically most expensive
- Available through dealerships and some retailers
Aftermarket Sensors:
- Less expensive than OEM
- Quality varies by manufacturer
- Must be programmed to vehicle
- Reputable brands work reliably
Universal/Programmable Sensors:
- Blank sensors programmed to match OEM specifications
- Flexible—can be programmed for various vehicles
- Cost between OEM and basic aftermarket
- Require programming equipment
Recommended Sensor Brands:
- Denso (Toyota OEM supplier)
- Continental
- Schrader
- ATEQ
Sensor Replacement Process
What’s Involved:
- Dismount tire from wheel
- Remove old sensor from valve stem or wheel
- Install new sensor in correct position
- Mount and balance tire
- Program sensor ID to vehicle’s TPMS module
- Verify proper operation
DIY Considerations: Sensor replacement is generally not a DIY job because:
- Tire mounting/dismounting requires special equipment
- Sensors must be handled carefully to avoid damage
- Programming requires TPMS tool
- Improper installation can damage sensor or wheel
Professional Service: Most tire shops and dealerships offer sensor replacement:
- Labor: $15-35 per sensor during tire service
- Parts: $30-150 per sensor depending on type
- Programming: Often included with installation
Cost Considerations
Replacement Timing Strategy:
- Replace sensors during scheduled tire replacement to minimize labor
- Consider replacing all sensors simultaneously if multiple are old
- Budget for sensor replacement when tires need replacement
Cost Comparison:
| Option | Per Sensor | All Four | Notes |
|---|---|---|---|
| OEM at Dealership | $100-150 | $400-600 | Highest cost, guaranteed fit |
| OEM Online + Installation | $60-100 | $240-400 | Save on parts |
| Quality Aftermarket | $30-60 | $120-240 | Good value option |
| Budget Aftermarket | $15-30 | $60-120 | Variable quality |
Frequently Asked Questions
Where is the tire pressure reset button on a Toyota RAV4?
The TPMS reset button location varies by model year:
2019-2025 RAV4: Most models don’t have a physical button. Reset is performed through the touchscreen infotainment system under Settings > Vehicle Settings > TPMS. Some early 2019-2020 models may have a button below the steering wheel on the left side of the dash.
2013-2018 RAV4: The reset button is typically located below the steering wheel on the driver’s side, near the hood release lever. It may also be inside the glove compartment. The button is small and may be labeled “TPMS SET” or show a tire symbol.
2006-2012 RAV4: The reset button is usually inside the glove compartment on the left wall or below the steering wheel. It’s a small button that may require a pen or similar object to press.
If you cannot locate the button, consult your owner’s manual which includes diagrams showing the exact location for your specific model.
Why is my tire pressure light still on after filling the tires?
Several reasons can cause the TPMS light to remain on after inflation:
Insufficient Driving Time: The system needs 15-30 minutes of driving at speeds above 25 mph to recalibrate. Simply inflating tires and checking the light immediately won’t clear the warning.
System Needs Manual Reset: Some RAV4 models require a manual reset after pressure correction. Follow the reset procedure for your model year.
Spare Tire Low: If your RAV4 has a TPMS sensor in the spare, low spare tire pressure will trigger the warning even if all four road tires are correct.
Incorrect Pressure: Double-check that you’ve inflated to the correct pressure specified on the door placard, not the maximum pressure on the tire sidewall.
Sensor Malfunction: A failed sensor can’t accurately report pressure. If the light flashes before staying solid, a sensor or system malfunction is indicated.
Pressure Still Low: One tire may have a slow leak that dropped pressure again shortly after inflation. Recheck all tires.
How long does it take for the TPMS light to reset?
After correcting tire pressure and performing the reset procedure:
Immediate Response: The reset button procedure should cause the light to blink three times within seconds, indicating the reset was accepted.
Calibration Time: The system then needs 15-30 minutes of driving at speeds above 25 mph to fully calibrate. During this time, the light may remain on.
Complete Reset: After adequate driving, the light should turn off. If it doesn’t, the system may need another reset or there may be an underlying issue.
Variation by Model: Some models reset faster than others. Fifth-generation RAV4s (2019+) often reset quickly, while older models may need longer driving time.
If the light hasn’t turned off after 30+ minutes of highway driving, repeat the reset procedure or investigate other causes.
Can I drive with the TPMS light on?
You can technically drive with the TPMS light on, but you shouldn’t ignore it:
If Pressure Is Correct: If you’ve verified all tires (including spare) are properly inflated and the light is on due to a sensor issue or pending reset, driving is safe. However, you won’t have TPMS protection if actual pressure loss occurs.
If Pressure Is Unknown: Don’t drive until you’ve checked pressure. Driving on significantly underinflated tires is dangerous.
Flashing Light: A flashing TPMS light indicates system malfunction. Have it diagnosed promptly, but driving is not immediately dangerous if tire pressure is manually verified.
Long-Term: Don’t ignore a persistent TPMS warning. Even if driving is safe in the short term, the system exists to protect you. Repair the issue to restore this safety feature.
How much does it cost to fix a TPMS sensor?
TPMS sensor replacement costs depend on several factors:
Single Sensor Replacement:
- Parts (OEM): $50-150
- Parts (aftermarket): $25-75
- Labor: $15-35 (often higher if tire must be dismounted specifically for sensor)
- Total: $75-200 per sensor
All Four Sensors:
- Parts: $100-500 depending on type
- Labor: $60-150
- Total: $160-650
Cost-Saving Tips:
- Replace sensors during scheduled tire replacement (minimizes labor)
- Use quality aftermarket sensors instead of OEM
- Consider programmable universal sensors
- Replace all sensors at once if vehicle is older (battery life is similar across sensors)
Additional Costs to Consider:
- TPMS relearn/programming: Sometimes included, sometimes $20-50 extra
- Valve stem service: May be recommended during sensor replacement
Do I need to reset TPMS after rotating tires?
It depends on your RAV4’s TPMS type:
Auto-Learning Systems: Many modern RAV4s have auto-learning TPMS that will automatically identify sensors in their new positions after driving. No reset required, though the system may take 15-30 minutes of driving to relearn.
Manual Registration Systems: Some RAV4 models require manual reset after rotation to register sensor positions. If the system displays individual tire pressure readings, incorrect positions after rotation indicate a manual reset is needed.
When Reset Is Recommended:
- If TPMS light illuminates after rotation
- If displayed tire positions don’t match actual positions
- If you notice any TPMS abnormalities after service
Best Practice: Perform a reset after rotation to ensure quick calibration and proper position display (if your model shows individual tire positions).
Why does my TPMS light come on when it’s cold?
Temperature-related TPMS warnings are common and have a scientific explanation:
The Physics: Air pressure decreases approximately 1 PSI for every 10°F drop in temperature. This relationship is based on the ideal gas law—cooler temperatures mean air molecules move slower and exert less pressure.
Typical Scenario: Tires inflated to 33 PSI on a warm fall day (65°F) may drop to 27-28 PSI on a cold morning (25°F). This 6 PSI drop can trigger the TPMS warning, which typically activates at 25% below recommended pressure.
Why It Happens Seasonally: The transition from fall to winter often triggers these warnings as overnight temperatures drop significantly.
Solutions:
- Check and adjust pressure during cold weather transitions
- Inflate slightly above placard specification going into cold weather (within safe limits)
- Check pressure in the morning before driving
- Expect the light to turn off as tires warm during driving
Important Note: Don’t ignore cold-weather warnings—pressure is actually low, even if only due to temperature. Proper inflation matters regardless of cause.
Additional Resources
For more information about tire pressure maintenance and TPMS systems, these resources provide valuable reference material:
- National Highway Traffic Safety Administration (NHTSA) Tire Safety Information — Federal guidelines on tire safety, proper inflation, and TPMS requirements
- Tire Industry Association — Industry resources on tire maintenance, TPMS technology, and professional service standards
These resources offer authoritative information on tire safety and TPMS technology.
Conclusion
Resetting the tire pressure light in your Toyota RAV4 is a straightforward process once you understand the specific procedure for your model year. Whether your RAV4 uses a touchscreen interface (2019+), a physical reset button (2013-2018), or a button hidden in the glove compartment (2006-2012), the basic principle remains the same: verify correct tire pressure, initiate the reset, and drive to allow the system to recalibrate.
Key takeaways from this guide:
Always address pressure first. Before attempting any reset, verify that all tires—including the spare—are inflated to the pressure specified on your door jamb placard. The TPMS is doing its job when it alerts you to low pressure.
Follow the correct procedure for your model. Reset methods vary by generation. Using the wrong procedure won’t damage anything, but it won’t successfully reset the system either. Consult this guide or your owner’s manual for your specific model year.
Drive after resetting. The reset button initiates calibration, but the system needs driving time to complete the process. Plan for at least 25-30 minutes of driving at highway speeds after any reset.
Don’t ignore persistent warnings. If the light won’t reset or returns quickly, investigate further. Check for leaks, verify sensor function, and seek professional diagnosis if needed.
Maintain your tires proactively. Monthly pressure checks, seasonal adjustments, and regular inspections prevent most TPMS issues before they occur.
The TPMS is a valuable safety feature that has prevented countless accidents since becoming mandatory in 2008. By understanding how to properly reset and maintain this system, you ensure it continues to protect you and your passengers while avoiding the frustration of unnecessary warning lights.
Whether you’re dealing with a seasonal temperature change, recovering from tire service, or troubleshooting a persistent warning, the procedures in this guide will help you successfully reset your RAV4’s tire pressure light and maintain optimal tire safety.